HuggingFace Transformers 4.17 : Notebooks/Examples : 画像分類の再調整 (翻訳/解説)
翻訳 : (株)クラスキャット セールスインフォメーション
作成日時 : 05/08/2022 (v4.17.0)
* 本ページは、HuggingFace Transformers の以下のドキュメントを翻訳した上で適宜、補足説明したものです:
* サンプルコードの動作確認はしておりますが、必要な場合には適宜、追加改変しています。
* ご自由にリンクを張って頂いてかまいませんが、sales-info@classcat.com までご一報いただけると嬉しいです。

- 人工知能研究開発支援
- 人工知能研修サービス(経営者層向けオンサイト研修)
- テクニカルコンサルティングサービス
- 実証実験(プロトタイプ構築)
- アプリケーションへの実装
- 人工知能研修サービス
- PoC(概念実証)を失敗させないための支援
- お住まいの地域に関係なく Web ブラウザからご参加頂けます。事前登録 が必要ですのでご注意ください。
◆ お問合せ : 本件に関するお問い合わせ先は下記までお願いいたします。
- 株式会社クラスキャット セールス・マーケティング本部 セールス・インフォメーション
- sales-info@classcat.com ; Web: www.classcat.com ; ClassCatJP

HuggingFace Transformers : Notebooks/Examples : 画像分類の再調整
このノートブックは画像分類のための事前訓練済みビジョンモデルをカスタムデータセット上で再調整する方法を示します。このアイデアは、事前訓練済みエンコーダの上にランダムに初期化された分類ヘッドを追加してモデルをラベル付けられたデータセット上でモデル全体を再調整することです。
ImageFolder
このノートブックはノートブックをカスタムデータセット (つまり、このチュートリアルでは EuroSAT ) 上で容易に実行するために ImageFolder 機能を活用します。ローカルフォルダか、zip や tar のようなローカル/リモートファイルから Dataset をロードできます。
任意のモデル
このノートブックは、以下のような、モデルが画像分類ヘッドを持つ限りは、モデルハブ からの任意のビジョンモデル・チェックポイントで任意の画像分類データセット上で実行するために構築されています。
要するに、AutoModelForImageClassification によりサポートされた任意のモデルです。
データ増強
このノートブックはデータ増強を適用するために Torchvision の transforms を利用します – 以下を含む、他のライブラリを利用する別のノートブックも提供していることに注意してください :
- Albumentations
- Kornia (訳注: リンク切れ)
- imgaug (訳注: リンク切れ)
このノートブックでは、https://huggingface.co/microsoft/swin-tiny-patch4-window7-224 チェックポイントから再調整しますが、ハブ には利用可能な非常に多くのチェックポイントがあることに注意してください。
model_checkpoint = "microsoft/swin-tiny-patch4-window7-224" # pre-trained model from which to fine-tune
batch_size = 32 # batch size for training and evaluation
始める前に、datasets と transformers ライブラリをインストールしましょう。
!pip install -q datasets transformers
このノートブックをローカルで開いている場合は、環境がそれらのライブラリの最新バージョンのインストールを持っていることを確認してください。
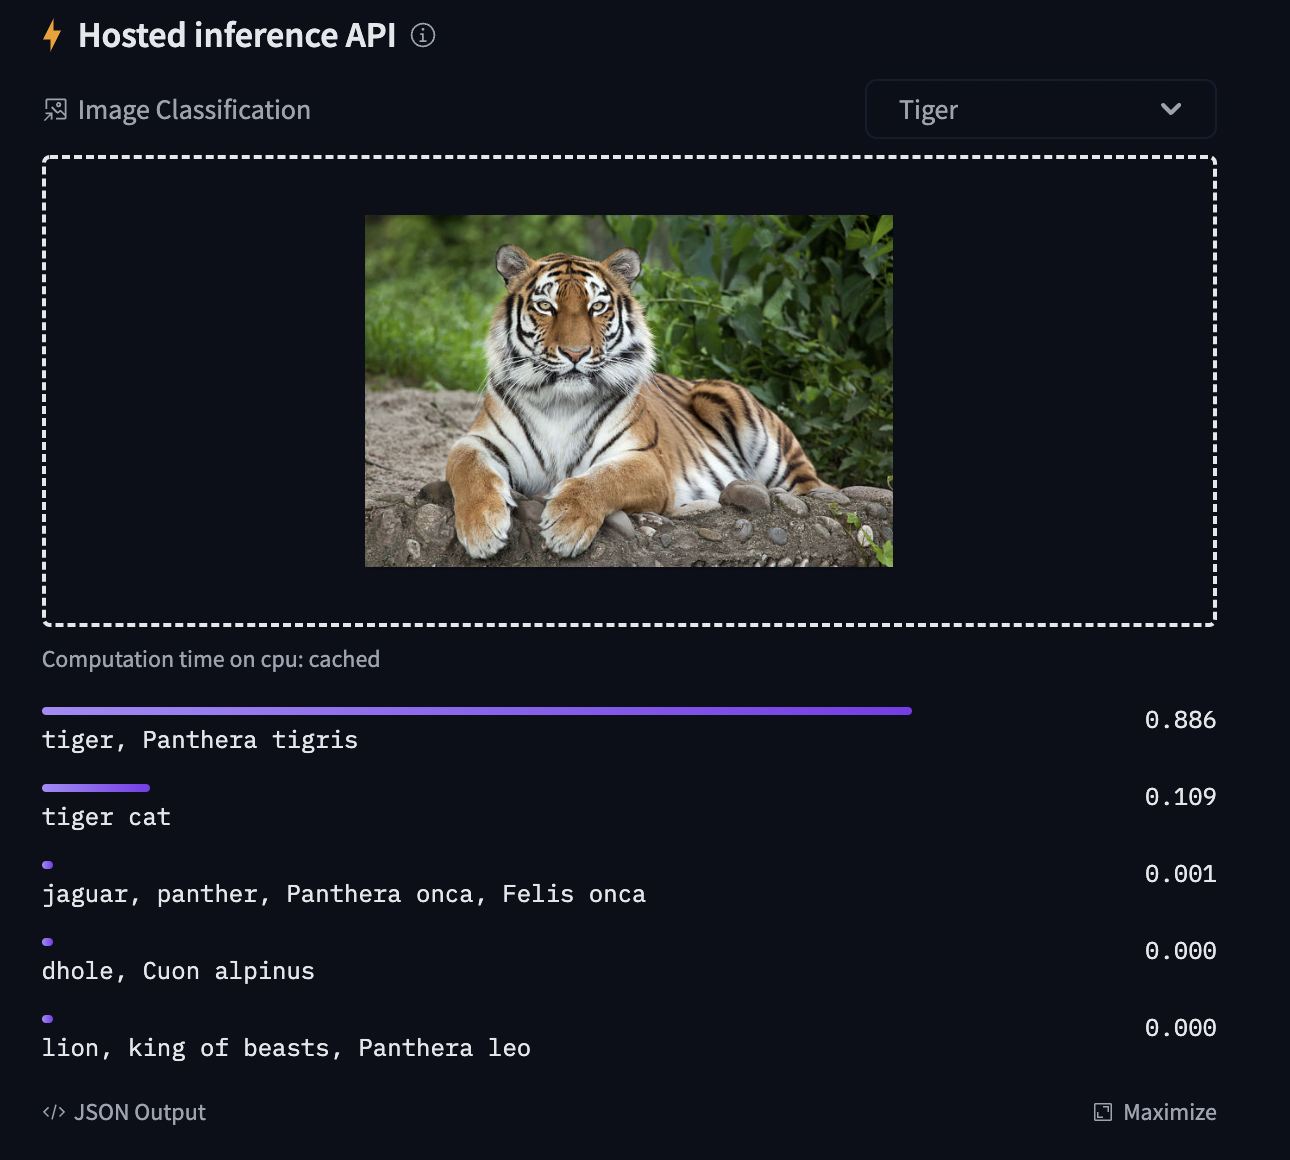
モデルをコミュニティと共有して、推論 API で下図で示されるもののような結果を生成することを可能にするには、従うべき幾つかのステップが更にあります。
最初に Hugging Face web サイトの認証トークンをストアしてから (まだなら ここ でサインアップ!) 次のセルを実行してトークンを入力する必要があります :
from huggingface_hub import notebook_login

notebook_login()
Login successful
Your token has been saved to /root/.huggingface/token
You might have to re-authenticate when pushing to the Hugging Face Hub. Run the following command in your terminal in case you want to set this credential helper as the default
git config --global credential.helper store
そしてモデルチェックポイントをアップロードするには Git-LFS をインストールする必要があります :
%%capture
!sudo apt -qq install git-lfs
!git config --global credential.helper store
画像分類タスク上のモデルの再調整
このノートブックでは、![]() Transformers ビジョンモデルの一つを画像分類データセットで再調整する方法を見ます。
Transformers ビジョンモデルの一つを画像分類データセットで再調整する方法を見ます。
画像が与えられたとき、目標は “tiger” のように、そのための適切なクラスを予測することです。下のスクリーンショットは ImageNet-1k で再調整された ViT から取られたものです – 推論ウィジェットを試してください!

データセットのロード
カスタムデータセットを DatasetDict にダウンロードするために ![]() Datasets ライブラリの ImageFolder 機能を使用します。
Datasets ライブラリの ImageFolder 機能を使用します。
この場合、EuroSAT データセットはリモートでホストされていますので、data_files 引数を与えます。代わりに、画像を含むローカルフォルダーを持つ場合、data_dir 引数を使用してそれらをロードできます。
from datasets import load_dataset

# load a custom dataset from local/remote files or folders using the ImageFolder feature

# option 1: local/remote files (supporting the following formats: tar, gzip, zip, xz, rar, zstd)
dataset = load_dataset("imagefolder", data_files="https://madm.dfki.de/files/sentinel/EuroSAT.zip")

# note that you can also provide several splits:
# dataset = load_dataset("imagefolder", data_files={"train": ["path/to/file1", "path/to/file2"], "test": ["path/to/file3", "path/to/file4"]})

# note that you can push your dataset to the hub very easily (and reload afterwards using load_dataset)!
# dataset.push_to_hub("nielsr/eurosat")
# dataset.push_to_hub("nielsr/eurosat", private=True)

# option 2: local folder
# dataset = load_dataset("imagefolder", data_dir="path_to_folder")

# option 3: just load any existing dataset from the hub, like CIFAR-10, FashionMNIST ...
# dataset = load_dataset("cifar10")
Using custom data configuration default-0537267e6f812d56
Downloading and preparing dataset image_folder/default to /root/.cache/huggingface/datasets/image_folder/default-0537267e6f812d56/0.0.0/ee92df8e96c6907f3c851a987be3fd03d4b93b247e727b69a8e23ac94392a091...
Downloading data files: 0it [00:00, ?it/s]
Downloading data files:   0%|          | 0/1 [00:00<?, ?it/s]
Downloading data:   0%|          | 0.00/94.3M [00:00<?, ?B/s]
Extracting data files:   0%|          | 0/1 [00:00<?, ?it/s]
Generating train split: 0 examples [00:00, ? examples/s]
Dataset image_folder downloaded and prepared to /root/.cache/huggingface/datasets/image_folder/default-0537267e6f812d56/0.0.0/ee92df8e96c6907f3c851a987be3fd03d4b93b247e727b69a8e23ac94392a091. Subsequent calls will reuse this data.
  0%|          | 0/1 [00:00<?, ?it/s]
Accuracy メトリックもロードしましょう、これは訓練の間と訓練後の両方でモデルを評価するために使用します。
from datasets import load_metric

metric = load_metric("accuracy")
Downloading builder script: 0%| | 0.00/1.41k [00:00<?, ?B/s]
dataset オブジェクト自身は DatasetDict で、これは分割毎に一つのキーを含みます (この場合は訓練分割のために “train” だけです)。
dataset
DatasetDict({
    train: Dataset({
        features: ['image', 'label'],
        num_rows: 27000
    })
})
実際の要素にアクセスするためには、最初に分割を選択してからインデックスを与える必要があります :
example = dataset["train"][10]
example
{'image': <PIL.JpegImagePlugin.JpegImageFile image mode=RGB size=64x64 at 0x7FF2F6277B10>,
 'label': 2}
各サンプルは画像と対応するラベルから成ります。これをデータセットの features を確認して検証することもできます :
dataset["train"].features
{'image': Image(decode=True, id=None),
 'label': ClassLabel(num_classes=10, names=['AnnualCrop', 'Forest', 'HerbaceousVegetation', 'Highway', 'Industrial', 'Pasture', 'PermanentCrop', 'Residential', 'River', 'SeaLake'], id=None)}
クールなことに、次のように画像を直接見ることができます (‘image’ フィールドが Image 機能であるため) :
example['image']

EuroSAT データセットの画像は低解像度 (64×64 ピクセル) なので少し大きくしましょう :
example['image'].resize((200, 200))

対応ラベルをプリントしましょう :
example['label']
2
見て分かるように、label フィールドは実際の文字列ラベルではありません。デフォルトでは ClassLabel フィールドは便宜上、整数にエンコードされます :
dataset["train"].features["label"]
ClassLabel(num_classes=10, names=['AnnualCrop', 'Forest', 'HerbaceousVegetation', 'Highway', 'Industrial', 'Pasture', 'PermanentCrop', 'Residential', 'River', 'SeaLake'], id=None)
それらを文字列にデコードし戻すしてそれらが何かを見るために id2label 辞書を作成しましょう。後でモデルをロードするとき、反対の label2id もまた有用です。
labels = dataset["train"].features["label"].names
label2id, id2label = dict(), dict()
for i, label in enumerate(labels):
    label2id[label] = i
    id2label[i] = label

id2label[2]
'HerbaceousVegetation'
データの前処理
これらの画像をモデルに供給できる前に、それらを前処理する必要があります。
画像の前処理は典型的には以下に行き着きます : (1) 特定のサイズにリサイズする, (2) カラーチャネル (R, G, B) を平均と標準偏差を用いて正規化する。これらは 画像変換 (image transformations) と呼ばれます。
加えて、モデルをより堅牢にして高い精度を得るために典型的には訓練の間に (ランダム切り抜きと反転のような) データ増強 (data augmentation) と呼ばれるものを遂行します。データ増強はまた訓練データのサイズを増やす素晴らしいテクニックです。
このチュートリアルでは画像変換/データ増強のために torchvision.transforms を使用しますが、(albumentations, imgaug, Kornia 等のような) 任意の他のパッケージを使用できることに注意してください。
モデルアーキテクチャのために (1) 適切なサイズにリサイズする, (2) 適切な画像平均と標準偏差を使用する, ことを確実にするため、AutoFeatureExtractor.from_pretrained メソッドで特徴抽出器と呼ばれるものをインスタンス化します。
この特徴抽出器は最小限のプリプロセッサで、推論用の画像を準備するために使用できます。
from transformers import AutoFeatureExtractor

feature_extractor = AutoFeatureExtractor.from_pretrained(model_checkpoint)
feature_extractor
Downloading:   0%|          | 0.00/255 [00:00<?, ?B/s]
ViTFeatureExtractor {
  "do_normalize": true,
  "do_resize": true,
  "feature_extractor_type": "ViTFeatureExtractor",
  "image_mean": [
    0.485,
    0.456,
    0.406
  ],
  "image_std": [
    0.229,
    0.224,
    0.225
  ],
  "resample": 3,
  "size": 224
}
Datasets ライブラリはデータを非常に簡単に処理するために作成されています。そしてカスタム関数を書くことができます、これは (.map() or .set_transform() を使用して) データセット全体に対して適用できます。
ここでは 2 つの別の関数を定義します、一つは訓練のため (これはデータ増強を含みます) で、一つは検証のため (これはリサイズ, 中心切り抜きと正規化だけを含みます) です。
from torchvision.transforms import (
    CenterCrop,
    Compose,
    Normalize,
    RandomHorizontalFlip,
    RandomResizedCrop,
    Resize,
    ToTensor,
)

normalize = Normalize(mean=feature_extractor.image_mean, std=feature_extractor.image_std)
train_transforms = Compose(
        [
            RandomResizedCrop(feature_extractor.size),
            RandomHorizontalFlip(),
            ToTensor(),
            normalize,
        ]
    )

val_transforms = Compose(
        [
            Resize(feature_extractor.size),
            CenterCrop(feature_extractor.size),
            ToTensor(),
            normalize,
        ]
    )

def preprocess_train(example_batch):
    """Apply train_transforms across a batch."""
    example_batch["pixel_values"] = [
        train_transforms(image.convert("RGB")) for image in example_batch["image"]
    ]
    return example_batch

def preprocess_val(example_batch):
    """Apply val_transforms across a batch."""
    example_batch["pixel_values"] = [val_transforms(image.convert("RGB")) for image in example_batch["image"]]
    return example_batch
次に、これらの関数を適用してデータセットを前処理できます。set_transform 機能を使用します、これは上の関数を on-the-fly に適用することを可能にします (つまり、画像が RAM にロードされたときだけにそれらが適用されます)。
# split up training into training + validation
splits = dataset["train"].train_test_split(test_size=0.1)
train_ds = splits['train']
val_ds = splits['test']
train_ds.set_transform(preprocess_train)
val_ds.set_transform(preprocess_val)
“pixel_values” 特徴が追加されたことを見るために要素にアクセスしましょう :
train_ds[0]
{'image': <PIL.JpegImagePlugin.JpegImageFile image mode=RGB size=64x64 at 0x7FF2EFFB0D90>,
 'label': 9,
 'pixel_values': tensor([[[-0.3541, -0.3541, -0.3541,  ..., -0.3712, -0.3712, -0.3712],
          [-0.3541, -0.3541, -0.3541,  ..., -0.3712, -0.3712, -0.3712],
          [-0.3541, -0.3541, -0.3541,  ..., -0.3712, -0.3712, -0.3712],
          ...,
          [-0.4397, -0.4397, -0.4397,  ..., -0.4911, -0.4911, -0.4911],
          [-0.4397, -0.4397, -0.4397,  ..., -0.4911, -0.4911, -0.4911],
          [-0.4397, -0.4397, -0.4397,  ..., -0.4911, -0.4911, -0.4911]],

         [[-0.2500, -0.2500, -0.2500,  ..., -0.2850, -0.2850, -0.2850],
          [-0.2500, -0.2500, -0.2500,  ..., -0.2850, -0.2850, -0.2850],
          [-0.2500, -0.2500, -0.2500,  ..., -0.2850, -0.2850, -0.2850],
          ...,
          [-0.3550, -0.3550, -0.3550,  ..., -0.4076, -0.4076, -0.4076],
          [-0.3550, -0.3550, -0.3550,  ..., -0.4076, -0.4076, -0.4076],
          [-0.3550, -0.3550, -0.3550,  ..., -0.4076, -0.4076, -0.4076]],

         [[ 0.1128,  0.1128,  0.1128,  ...,  0.1651,  0.1651,  0.1651],
          [ 0.1128,  0.1128,  0.1128,  ...,  0.1651,  0.1651,  0.1651],
          [ 0.1128,  0.1128,  0.1128,  ...,  0.1651,  0.1651,  0.1651],
          ...,
          [ 0.0605,  0.0605,  0.0605,  ...,  0.0082,  0.0082,  0.0082],
          [ 0.0605,  0.0605,  0.0605,  ...,  0.0082,  0.0082,  0.0082],
          [ 0.0605,  0.0605,  0.0605,  ...,  0.0082,  0.0082,  0.0082]]])}
モデルの訓練
データの準備ができた今、事前訓練済みモデルをダウンロードして再調整できます。分類のためには AutoModelForImageClassification クラスを使用します。その from_pretrained メソッドの呼び出しは重みをダウンロードしてキャッシュします。ラベル id とラベル数はデータセット依存なので、ここでは model_checkpoint と共に label2id と id2label を渡します。これは (カスタム数の出力ニューロンを持つ) カスタム分類ヘッドが作成されることを確実にします。
NOTE : (ImageNet-1k 上で既に再調整されている) facebook/convnext-tiny-224 のような、既に再調整されたチェックポイントを再調整することを計画している場合、from_pretrained メソッドに追加引数 ignore_mismatched_sizes=True を提供する必要があります。(1000 出力ニューロンを持つ) 出力ヘッドは捨てられ、カスタム数の出力ニューロンを含む新しい、ランダムに初期化された分類ヘッドにより置き換えられことを確実にします。事前訓練済みモデルがヘッドを含まない場合、この引数を指定する必要はありません。
from transformers import AutoModelForImageClassification, TrainingArguments, Trainer

model = AutoModelForImageClassification.from_pretrained(
    model_checkpoint,
    label2id=label2id,
    id2label=id2label,
    ignore_mismatched_sizes = True, # provide this in case you're planning to fine-tune an already fine-tuned checkpoint
)
Downloading:   0%|          | 0.00/70.1k [00:00<?, ?B/s]
Downloading:   0%|          | 0.00/108M [00:00<?, ?B/s]
/usr/local/lib/python3.7/dist-packages/torch/functional.py:445: UserWarning: torch.meshgrid: in an upcoming release, it will be required to pass the indexing argument. (Triggered internally at  ../aten/src/ATen/native/TensorShape.cpp:2157.)
  return _VF.meshgrid(tensors, **kwargs)  # type: ignore[attr-defined]
Some weights of SwinForImageClassification were not initialized from the model checkpoint at microsoft/swin-tiny-patch4-window7-224 and are newly initialized because the shapes did not match:
- classifier.weight: found shape torch.Size([1000, 768]) in the checkpoint and torch.Size([10, 768]) in the model instantiated
- classifier.bias: found shape torch.Size([1000]) in the checkpoint and torch.Size([10]) in the model instantiated
You should probably TRAIN this model on a down-stream task to be able to use it for predictions and inference.
警告は、幾つかの重み (分類器層の重みとバイアス) を捨てて、幾つかの他の重み (新しい分類器層の重みとバイアス) をランダムに初期化していることを知らせています。このケースではこれは想定されています、何故ならば事前訓練済みの重みを持っていない新しいヘッドを追加しているからです、そのためライブラリはこのモデルを推論用に使用する前に再調整するべきであると警告しています、これはまさに行おうとしていることです。
Trainer をインスタンス化するためには、訓練 configuration と評価メトリックを定義する必要があります。最も重要なのは TrainingArguments で、これは訓練をカスタマイズするための総ての属性を含むクラスです。それは一つのフォルダ名を必要とします、これはモデルのチェックポイントをセーブするために使用されます。
殆どの訓練引数は説明を要しませんが、ここで非常に重要なものは remove_unused_columns=False です。これはモデルの call 関数で使用されない特徴はドロップされます。デフォルトでこれは True です、何故ならば通常は使用されない特徴カラムはドロップされるのが理想的で、入力をモデルの call 関数内にアンパックすることを容易にします。しかし、私達のケースでは、’pixel_values’ を作成するために未使用の特徴 (特に ‘image’) を必要とします。
model_name = model_checkpoint.split("/")[-1]

args = TrainingArguments(
    f"{model_name}-finetuned-eurosat",
    remove_unused_columns=False,
    evaluation_strategy = "epoch",
    save_strategy = "epoch",
    learning_rate=5e-5,
    per_device_train_batch_size=batch_size,
    gradient_accumulation_steps=4,
    per_device_eval_batch_size=batch_size,
    num_train_epochs=3,
    warmup_ratio=0.1,
    logging_steps=10,
    load_best_model_at_end=True,
    metric_for_best_model="accuracy",
    push_to_hub=True,
)
ここでは評価が各エポックの最後に成されるように設定し、学習率を微調整し、ノートブックの冒頭で定義された batch_size を使用し、そして訓練のためのエポック数と重み減衰をカスタマイズします。ベストモデルは訓練の最後のものではないかもしれないので、訓練の最後に Trainer にそれが (metric_name に従って) セーブしたベストモデルをロードさせます。
最後の引数 push_to_hub は Trainer が訓練中にモデルを ハブ に定期的にプッシュすることを可能にします。ノートブックの冒頭のインストールステップに従わなかった場合にはそれを除去してください。モデルをレポジトリの名前とは異なる名前でローカルにセーブすることを望む場合や、貴方の名前空間ではなく組織下でモデルをプッシュすることを望む場合、repo 名を設定するために hub_model_id を使用してください (それは名前空間を含む、完全な名前である必要があります : 例えば “nielsr/vit-finetuned-cifar10” or “huggingface/nielsr/vit-finetuned-cifar10” です)。
次に、予測からメトリクスを計算する方法に対する関数を定義する必要があり、これは先にロードしたメトリックを単に使用します。行わなければならない唯一の前処理は予測ロジットの argmax を取ります :
import numpy as np

# the compute_metrics function takes a Named Tuple as input:
# predictions, which are the logits of the model as Numpy arrays,
# and label_ids, which are the ground-truth labels as Numpy arrays.
def compute_metrics(eval_pred):
    """Computes accuracy on a batch of predictions"""
    predictions = np.argmax(eval_pred.predictions, axis=1)
    return metric.compute(predictions=predictions, references=eval_pred.label_ids)
collate_fn も定義します、これはサンプルをまとめてバッチ処理するために使用されます。各バッチは 2 つのキーからなります、つまり pixel_values と labels です。
import torch

def collate_fn(examples):
    pixel_values = torch.stack([example["pixel_values"] for example in examples])
    labels = torch.tensor([example["label"] for example in examples])
    return {"pixel_values": pixel_values, "labels": labels}
そしてこの総てをデータセットとともに Trainer に渡す必要があるだけです :
trainer = Trainer(
    model,
    args,
    train_dataset=train_ds,
    eval_dataset=val_ds,
    tokenizer=feature_extractor,
    compute_metrics=compute_metrics,
    data_collator=collate_fn,
)
Cloning https://huggingface.co/nielsr/swin-tiny-patch4-window7-224-finetuned-eurosat into local empty directory.
データを既に前処理している時に tokenizer として feature_extractor を渡すことに疑問があるかもしれません。これは、(JSON としてストアされた) 特徴抽出器 configuration ファイルがまたハブ上のレポにアップロードされることを確実にするだけです。
そして train メソッドを呼び出すことによりモデルを再調整できます :
train_results = trainer.train()
# rest is optional but nice to have
trainer.save_model()
trainer.log_metrics("train", train_results.metrics)
trainer.save_metrics("train", train_results.metrics)
trainer.save_state()
/usr/local/lib/python3.7/dist-packages/transformers/optimization.py:309: FutureWarning: This implementation of AdamW is deprecated and will be removed in a future version. Use the PyTorch implementation torch.optim.AdamW instead, or set `no_deprecation_warning=True` to disable this warning
  FutureWarning,
***** Running training *****
  Num examples = 24300
  Num Epochs = 3
  Instantaneous batch size per device = 32
  Total train batch size (w. parallel, distributed & accumulation) = 128
  Gradient Accumulation steps = 4
  Total optimization steps = 570
[570/570 16:11, Epoch 3/3]
Epoch	Training Loss	Validation Loss	Accuracy
1	0.262100	0.108344	0.962963
2	0.176900	0.142533	0.950000
3	0.134300	0.066442	0.974444
***** Running Evaluation *****
  Num examples = 2700
  Batch size = 32
Saving model checkpoint to swin-tiny-patch4-window7-224-finetuned-eurosat/checkpoint-190
Configuration saved in swin-tiny-patch4-window7-224-finetuned-eurosat/checkpoint-190/config.json
Model weights saved in swin-tiny-patch4-window7-224-finetuned-eurosat/checkpoint-190/pytorch_model.bin
Feature extractor saved in swin-tiny-patch4-window7-224-finetuned-eurosat/checkpoint-190/preprocessor_config.json
Feature extractor saved in swin-tiny-patch4-window7-224-finetuned-eurosat/preprocessor_config.json
***** Running Evaluation *****
  Num examples = 2700
  Batch size = 32
Saving model checkpoint to swin-tiny-patch4-window7-224-finetuned-eurosat/checkpoint-380
Configuration saved in swin-tiny-patch4-window7-224-finetuned-eurosat/checkpoint-380/config.json
Model weights saved in swin-tiny-patch4-window7-224-finetuned-eurosat/checkpoint-380/pytorch_model.bin
Feature extractor saved in swin-tiny-patch4-window7-224-finetuned-eurosat/checkpoint-380/preprocessor_config.json
Feature extractor saved in swin-tiny-patch4-window7-224-finetuned-eurosat/preprocessor_config.json
***** Running Evaluation *****
  Num examples = 2700
  Batch size = 32
Saving model checkpoint to swin-tiny-patch4-window7-224-finetuned-eurosat/checkpoint-570
Configuration saved in swin-tiny-patch4-window7-224-finetuned-eurosat/checkpoint-570/config.json
Model weights saved in swin-tiny-patch4-window7-224-finetuned-eurosat/checkpoint-570/pytorch_model.bin
Feature extractor saved in swin-tiny-patch4-window7-224-finetuned-eurosat/checkpoint-570/preprocessor_config.json
Feature extractor saved in swin-tiny-patch4-window7-224-finetuned-eurosat/preprocessor_config.json


Training completed. Do not forget to share your model on huggingface.co/models =)


Loading best model from swin-tiny-patch4-window7-224-finetuned-eurosat/checkpoint-570 (score: 0.9744444444444444).
Saving model checkpoint to swin-tiny-patch4-window7-224-finetuned-eurosat
Configuration saved in swin-tiny-patch4-window7-224-finetuned-eurosat/config.json
Model weights saved in swin-tiny-patch4-window7-224-finetuned-eurosat/pytorch_model.bin
Feature extractor saved in swin-tiny-patch4-window7-224-finetuned-eurosat/preprocessor_config.json
Saving model checkpoint to swin-tiny-patch4-window7-224-finetuned-eurosat
Configuration saved in swin-tiny-patch4-window7-224-finetuned-eurosat/config.json
Model weights saved in swin-tiny-patch4-window7-224-finetuned-eurosat/pytorch_model.bin
Feature extractor saved in swin-tiny-patch4-window7-224-finetuned-eurosat/preprocessor_config.json
Several commits (2) will be pushed upstream.
The progress bars may be unreliable.
Upload file pytorch_model.bin:   0%|          | 3.34k/105M [00:00<?, ?B/s]
Upload file runs/Apr12_08-48-13_9520b574893c/events.out.tfevents.1649753401.9520b574893c.77.0:  24%|##4
To https://huggingface.co/nielsr/swin-tiny-patch4-window7-224-finetuned-eurosat
   b46a767..6d6b8dc  main -> main

To https://huggingface.co/nielsr/swin-tiny-patch4-window7-224-finetuned-eurosat
   6d6b8dc..25dd5d7  main -> main
***** train metrics *****
  epoch                    =          3.0
  total_flos               = 1687935228GF
  train_loss               =       0.3276
  train_runtime            =   0:16:13.91
  train_samples_per_second =       74.852
  train_steps_per_second   =        0.585
Trainer がベストモデルを正しく再ロードしたことは (それが最後のものでない場合) evaluate メソッドで確認できます :
metrics = trainer.evaluate()
# some nice to haves:
trainer.log_metrics("eval", metrics)
trainer.save_metrics("eval", metrics)
***** Running Evaluation *****
  Num examples = 2700
  Batch size = 32
[85/85 00:15]
***** eval metrics *****
  epoch                   =        3.0
  eval_accuracy           =     0.9744
  eval_loss               =     0.0664
  eval_runtime            = 0:00:16.12
  eval_samples_per_second =     167.48
  eval_steps_per_second   =      5.273
そして単にこの命令を実行すれば、訓練の結果をハブにアップロードすることができます (Trainer は Tensorboard ログに加えてモデルカードを自動的に作成することに注意してください – “Training metrics” タブ参照 – amazing isn’t it?) :
trainer.push_to_hub()
Saving model checkpoint to swin-tiny-patch4-window7-224-finetuned-eurosat
Configuration saved in swin-tiny-patch4-window7-224-finetuned-eurosat/config.json
Model weights saved in swin-tiny-patch4-window7-224-finetuned-eurosat/pytorch_model.bin
Feature extractor saved in swin-tiny-patch4-window7-224-finetuned-eurosat/preprocessor_config.json
Upload file runs/Apr12_08-48-13_9520b574893c/events.out.tfevents.1649754586.9520b574893c.77.2: 100%|##########…
To https://huggingface.co/nielsr/swin-tiny-patch4-window7-224-finetuned-eurosat
   25dd5d7..2164338  main -> main
'https://huggingface.co/nielsr/swin-tiny-patch4-window7-224-finetuned-eurosat/commit/2164338db59d40004286bc65800bfa50561ecd3d'
今ではこのモデルを総ての友人、家族、お気に入りのペットと共有することができます : それを識別子 “your-username/the-name-you-picked” でロードできます、例えば :
from transformers import AutoModelForImageClassification, AutoFeatureExtractor

feature_extractor = AutoFeatureExtractor.from_pretrained("nielsr/my-awesome-model")
model = AutoModelForImageClassification.from_pretrained("nielsr/my-awesome-model")
推論
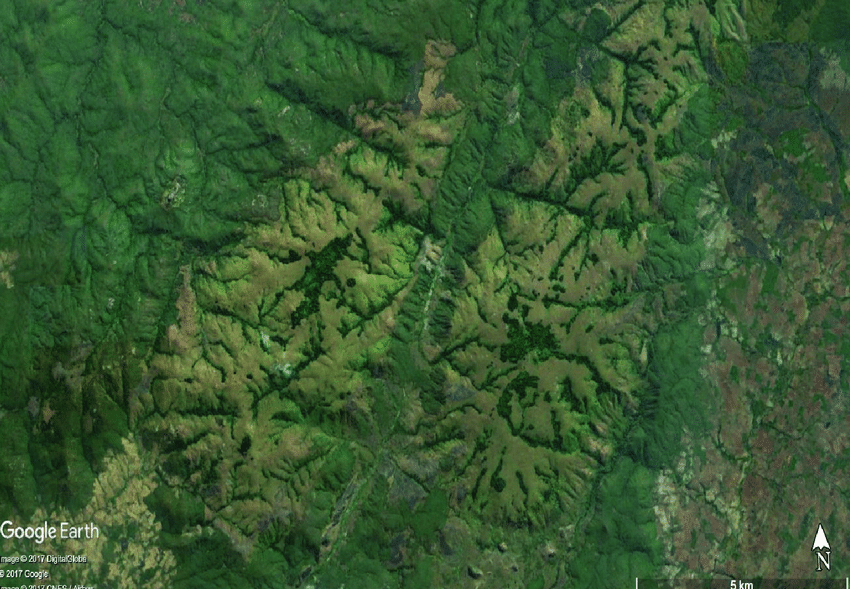
新しい画像があり、それに対して予測をしたいとしましょう。森林の衛星画像 (それは EuroSAT データセットの一部ではありません) をロードして、モデルがどのように行なうかを見ましょう。
from PIL import Image
import requests

url = 'https://huggingface.co/nielsr/convnext-tiny-finetuned-eurostat/resolve/main/forest.png'
image = Image.open(requests.get(url, stream=True).raw)
image

ハブから特徴抽出器とモデルをロードします (ここでは、Auto クラス を使用します、これはハブの repo の config.json と preprocessor_config.json ファイルに基づいて適切なクラスが自動的にロードされることを確実にします)。
from transformers import AutoModelForImageClassification, AutoFeatureExtractor

repo_name = "nielsr/swin-tiny-patch4-window7-224-finetuned-eurosat"

feature_extractor = AutoFeatureExtractor.from_pretrained(repo_name)
model = AutoModelForImageClassification.from_pretrained(repo_name)
https://huggingface.co/nielsr/swin-tiny-patch4-window7-224-finetuned-eurosat/resolve/main/preprocessor_config.json not found in cache or force_download set to True, downloading to /root/.cache/huggingface/transformers/tmpqggthctf
Downloading: 0%| | 0.00/240 [00:00<?, ?B/s]
storing https://huggingface.co/nielsr/swin-tiny-patch4-window7-224-finetuned-eurosat/resolve/main/preprocessor_config.json in cache at /root/.cache/huggingface/transformers/7b742d61fc51f2ef5f81a75f80b26419c9f5bd86cc3022ed5784d09823f219f2.e34548f8325ec440fcf4990d4a8dbbfd665397400e9a700766de032d2b45cf6b
creating metadata file for /root/.cache/huggingface/transformers/7b742d61fc51f2ef5f81a75f80b26419c9f5bd86cc3022ed5784d09823f219f2.e34548f8325ec440fcf4990d4a8dbbfd665397400e9a700766de032d2b45cf6b
loading feature extractor configuration file https://huggingface.co/nielsr/swin-tiny-patch4-window7-224-finetuned-eurosat/resolve/main/preprocessor_config.json from cache at /root/.cache/huggingface/transformers/7b742d61fc51f2ef5f81a75f80b26419c9f5bd86cc3022ed5784d09823f219f2.e34548f8325ec440fcf4990d4a8dbbfd665397400e9a700766de032d2b45cf6b
Feature extractor ViTFeatureExtractor {
  "do_normalize": true,
  "do_resize": true,
  "feature_extractor_type": "ViTFeatureExtractor",
  "image_mean": [
    0.485,
    0.456,
    0.406
  ],
  "image_std": [
    0.229,
    0.224,
    0.225
  ],
  "resample": 3,
  "size": 224
}

https://huggingface.co/nielsr/swin-tiny-patch4-window7-224-finetuned-eurosat/resolve/main/config.json not found in cache or force_download set to True, downloading to /root/.cache/huggingface/transformers/tmpzdd89w3g
Downloading: 0%| | 0.00/1.24k [00:00<?, ?B/s]
storing https://huggingface.co/nielsr/swin-tiny-patch4-window7-224-finetuned-eurosat/resolve/main/config.json in cache at /root/.cache/huggingface/transformers/83e4a1dea85e8e284e4da8ae1e3cf950c2c7e74d65a5a188049b3371fcd151bd.f1ed4852dd8f4c3d0c565427607bc41fff51b58ac73a0970bec8456e5c64cea0
creating metadata file for /root/.cache/huggingface/transformers/83e4a1dea85e8e284e4da8ae1e3cf950c2c7e74d65a5a188049b3371fcd151bd.f1ed4852dd8f4c3d0c565427607bc41fff51b58ac73a0970bec8456e5c64cea0
loading configuration file https://huggingface.co/nielsr/swin-tiny-patch4-window7-224-finetuned-eurosat/resolve/main/config.json from cache at /root/.cache/huggingface/transformers/83e4a1dea85e8e284e4da8ae1e3cf950c2c7e74d65a5a188049b3371fcd151bd.f1ed4852dd8f4c3d0c565427607bc41fff51b58ac73a0970bec8456e5c64cea0
Model config SwinConfig {
  "_name_or_path": "nielsr/swin-tiny-patch4-window7-224-finetuned-eurosat",
  "architectures": [
    "SwinForImageClassification"
  ],
  "attention_probs_dropout_prob": 0.0,
  "depths": [
    2,
    2,
    6,
    2
  ],
  "drop_path_rate": 0.1,
  "embed_dim": 96,
  "encoder_stride": 32,
  "hidden_act": "gelu",
  "hidden_dropout_prob": 0.0,
  "hidden_size": 768,
  "id2label": {
    "0": "AnnualCrop",
    "1": "Forest",
    "2": "HerbaceousVegetation",
    "3": "Highway",
    "4": "Industrial",
    "5": "Pasture",
    "6": "PermanentCrop",
    "7": "Residential",
    "8": "River",
    "9": "SeaLake"
  },
  "image_size": 224,
  "initializer_range": 0.02,
  "label2id": {
    "AnnualCrop": 0,
    "Forest": 1,
    "HerbaceousVegetation": 2,
    "Highway": 3,
    "Industrial": 4,
    "Pasture": 5,
    "PermanentCrop": 6,
    "Residential": 7,
    "River": 8,
    "SeaLake": 9
  },
  "layer_norm_eps": 1e-05,
  "mlp_ratio": 4.0,
  "model_type": "swin",
  "num_channels": 3,
  "num_heads": [
    3,
    6,
    12,
    24
  ],
  "num_layers": 4,
  "patch_size": 4,
  "path_norm": true,
  "problem_type": "single_label_classification",
  "qkv_bias": true,
  "torch_dtype": "float32",
  "transformers_version": "4.18.0",
  "use_absolute_embeddings": false,
  "window_size": 7
}

https://huggingface.co/nielsr/swin-tiny-patch4-window7-224-finetuned-eurosat/resolve/main/pytorch_model.bin not found in cache or force_download set to True, downloading to /root/.cache/huggingface/transformers/tmpkh0vdu53
Downloading: 0%| | 0.00/105M [00:00<?, ?B/s]
storing https://huggingface.co/nielsr/swin-tiny-patch4-window7-224-finetuned-eurosat/resolve/main/pytorch_model.bin in cache at /root/.cache/huggingface/transformers/3daadbe0cabef18dc0e2232ae080d135a9d4ee6b1dc7675725ef38bedb990b81.818e63819e125637bd8a94f43b6899d1552f0b45884f1c28c458a5cb55dfa9e5
creating metadata file for /root/.cache/huggingface/transformers/3daadbe0cabef18dc0e2232ae080d135a9d4ee6b1dc7675725ef38bedb990b81.818e63819e125637bd8a94f43b6899d1552f0b45884f1c28c458a5cb55dfa9e5
loading weights file https://huggingface.co/nielsr/swin-tiny-patch4-window7-224-finetuned-eurosat/resolve/main/pytorch_model.bin from cache at /root/.cache/huggingface/transformers/3daadbe0cabef18dc0e2232ae080d135a9d4ee6b1dc7675725ef38bedb990b81.818e63819e125637bd8a94f43b6899d1552f0b45884f1c28c458a5cb55dfa9e5
All model checkpoint weights were used when initializing SwinForImageClassification.

All the weights of SwinForImageClassification were initialized from the model checkpoint at nielsr/swin-tiny-patch4-window7-224-finetuned-eurosat.
If your task is similar to the task the model of the checkpoint was trained on, you can already use SwinForImageClassification for predictions without further training.
# prepare image for the model
encoding = feature_extractor(image.convert("RGB"), return_tensors="pt")
print(encoding.pixel_values.shape)
torch.Size([1, 3, 224, 224])
import torch

# forward pass
with torch.no_grad():
  outputs = model(**encoding)
  logits = outputs.logits
predicted_class_idx = logits.argmax(-1).item()
print("Predicted class:", model.config.id2label[predicted_class_idx])
Predicted class: Forest
Looks like our model got it correct!
パイプライン API
ハブの任意のモデルで推論を素早く実行する他の方法はパイプライン API を利用することです、これは上で手動で行なったステップの総てを抽象化します。それは前処理、forward パスとポスト処理の総てを単一オブジェクトで実行します。
訓練済みのモデルに対してこれを示しましょう :
from transformers import pipeline

pipe = pipeline("image-classification", "nielsr/swin-tiny-patch4-window7-224-finetuned-eurosat")
loading configuration file https://huggingface.co/nielsr/swin-tiny-patch4-window7-224-finetuned-eurosat/resolve/main/config.json from cache at /root/.cache/huggingface/transformers/83e4a1dea85e8e284e4da8ae1e3cf950c2c7e74d65a5a188049b3371fcd151bd.f1ed4852dd8f4c3d0c565427607bc41fff51b58ac73a0970bec8456e5c64cea0
Model config SwinConfig {
"_name_or_path": "nielsr/swin-tiny-patch4-window7-224-finetuned-eurosat",
"architectures": [
"SwinForImageClassification"
],
"attention_probs_dropout_prob": 0.0,
"depths": [
2,
2,
6,
2
],
"drop_path_rate": 0.1,
"embed_dim": 96,
"encoder_stride": 32,
"hidden_act": "gelu",
"hidden_dropout_prob": 0.0,
"hidden_size": 768,
"id2label": {
"0": "AnnualCrop",
"1": "Forest",
"2": "HerbaceousVegetation",
"3": "Highway",
"4": "Industrial",
"5": "Pasture",
"6": "PermanentCrop",
"7": "Residential",
"8": "River",
"9": "SeaLake"
},
"image_size": 224,
"initializer_range": 0.02,
"label2id": {
"AnnualCrop": 0,
"Forest": 1,
"HerbaceousVegetation": 2,
"Highway": 3,
"Industrial": 4,
"Pasture": 5,
"PermanentCrop": 6,
"Residential": 7,
"River": 8,
"SeaLake": 9
},
"layer_norm_eps": 1e-05,
"mlp_ratio": 4.0,
"model_type": "swin",
"num_channels": 3,
"num_heads": [
3,
6,
12,
24
],
"num_layers": 4,
"patch_size": 4,
"path_norm": true,
"problem_type": "single_label_classification",
"qkv_bias": true,
"torch_dtype": "float32",
"transformers_version": "4.18.0",
"use_absolute_embeddings": false,
"window_size": 7
}
loading weights file https://huggingface.co/nielsr/swin-tiny-patch4-window7-224-finetuned-eurosat/resolve/main/pytorch_model.bin from cache at /root/.cache/huggingface/transformers/3daadbe0cabef18dc0e2232ae080d135a9d4ee6b1dc7675725ef38bedb990b81.818e63819e125637bd8a94f43b6899d1552f0b45884f1c28c458a5cb55dfa9e5
All model checkpoint weights were used when initializing SwinForImageClassification.
All the weights of SwinForImageClassification were initialized from the model checkpoint at nielsr/swin-tiny-patch4-window7-224-finetuned-eurosat.
If your task is similar to the task the model of the checkpoint was trained on, you can already use SwinForImageClassification for predictions without further training.
loading feature extractor configuration file https://huggingface.co/nielsr/swin-tiny-patch4-window7-224-finetuned-eurosat/resolve/main/preprocessor_config.json from cache at /root/.cache/huggingface/transformers/7b742d61fc51f2ef5f81a75f80b26419c9f5bd86cc3022ed5784d09823f219f2.e34548f8325ec440fcf4990d4a8dbbfd665397400e9a700766de032d2b45cf6b
Feature extractor ViTFeatureExtractor {
"do_normalize": true,
"do_resize": true,
"feature_extractor_type": "ViTFeatureExtractor",
"image_mean": [
0.485,
0.456,
0.406
],
"image_std": [
0.229,
0.224,
0.225
],
"resample": 3,
"size": 224
}
pipe(image)
[{'label': 'Forest', 'score': 0.7000269889831543},
 {'label': 'HerbaceousVegetation', 'score': 0.14589950442314148},
 {'label': 'Pasture', 'score': 0.10370415449142456},
 {'label': 'Highway', 'score': 0.014327816665172577},
 {'label': 'Residential', 'score': 0.0139168007299304}]
ご覧のように、それは最高確率を持つクラスラベルを示すだけでなく、対応するスコアとともに top 5 ラベルを返します。このパイプラインはまたローカルのモデルと特徴抽出器でも動作します :
pipe = pipeline("image-classification",
                model=model,
                feature_extractor=feature_extractor)
pipe(image)
[{'label': 'Forest', 'score': 0.7000269889831543},
 {'label': 'HerbaceousVegetation', 'score': 0.14589950442314148},
 {'label': 'Pasture', 'score': 0.10370415449142456},
 {'label': 'Highway', 'score': 0.014327816665172577},
 {'label': 'Residential', 'score': 0.0139168007299304}]
以上
